Care Plans
Use the Chronic Disease Management (CDM) feature to specify care plans.
Before you begin
Permissions:
- View Care Plans
- Update Care Plans
About this task
Helix provides a set of care plan
templates:
- GPMP
- TCA
- GPMP + TCA
Procedure
To add a care plan:
-
From the
 Patient Search or
  Patient Queue, select the
  Consult panel.
-
In the Consult panel, select More >
 CDM.
CDM.
-
In the CDM panel, select a care plan from the list of
available Care Plan templates.
Tip: Care plans that have previously been added are listed. Select an existing plan to review it, or add a new plan.In our example, we have selected GPMP.

- If you have the Create Care Plan on behalf of HCP permission and are creating the care plan on behalf of a health care professional, select their name from the HCP list and click OK.
-
In the care plan, the existing authority information, Conditions, Health Summary, and
biometrics for the patient are displayed on the left-hand side. If you need to update
this information, click Update.
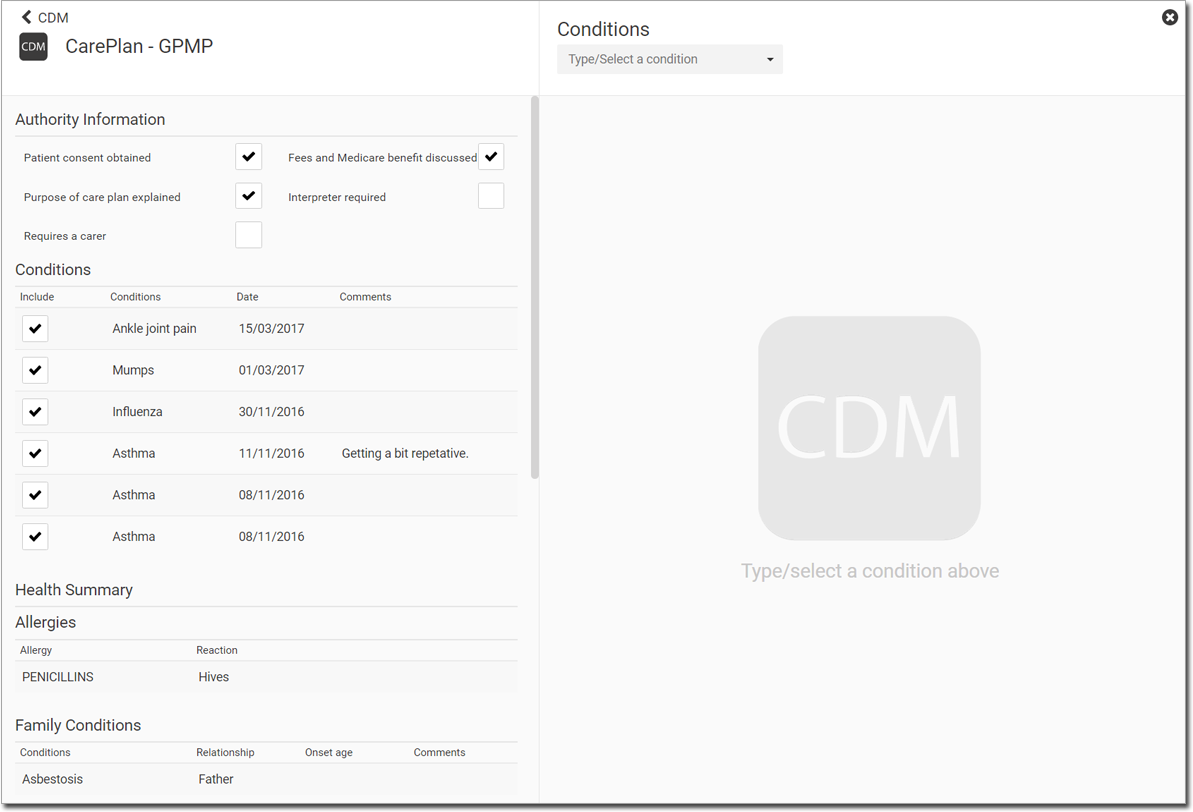
- To include or exclude information, set Include.
-
To add a condition to the care plan:
- From the Conditions list, select a condition. In our example, we have added
Asthma.
- To edit a row of information, click in it to activate edit
mode. Make changes as desired. Click off the panel to accept the changes.
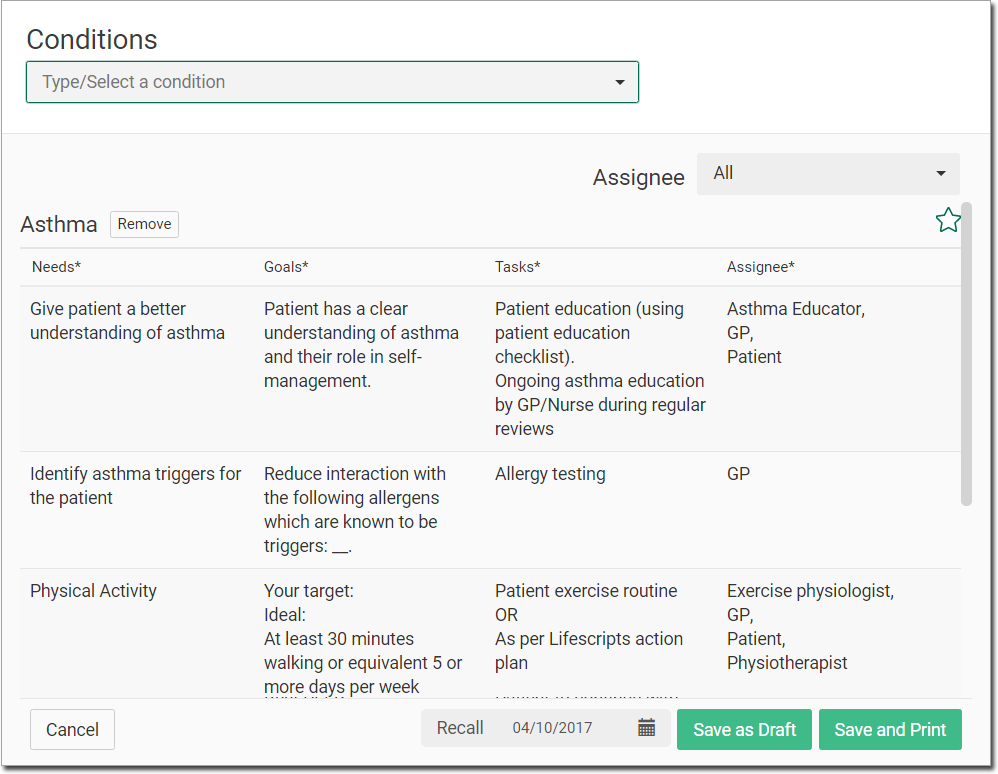
- The image below displays an example of a care plan in edit mode. Notice
that each field of information is active, awaiting your input.
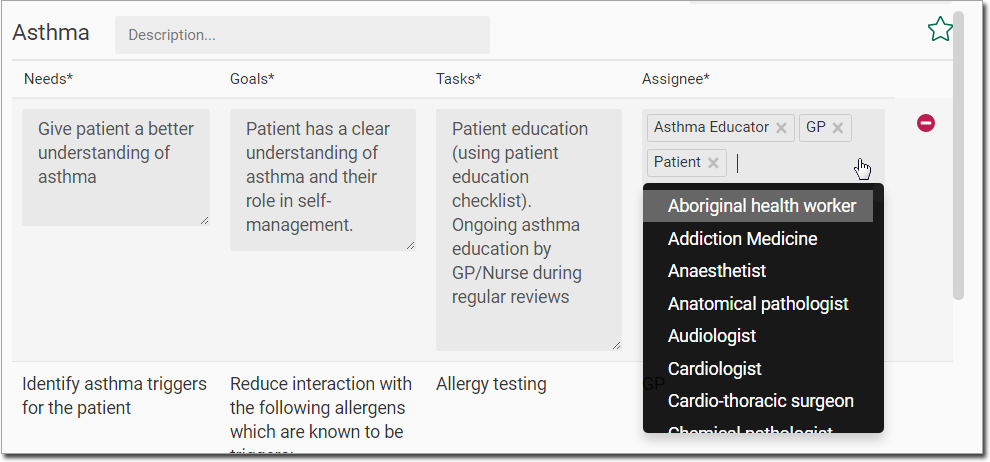
- Assign providers to the suggested needs. For example, we have indicated that the need of Give a patient a better understanding of asthma in the Needs column, must be provided by an Asthma Educator, in the Assignee column. Remove providers you don't need. To add more providers, click in the field, and select the provider from the list.
- If you feel that an entire row of information does not relate to your
patient, click
 Delete. Tip: Delete is available only in edit mode.
 - You can 'favourite' a condition, making it easy to select the next time
you create a care plan. To do so, click the condition to go into edit
mode, make changes as desired, add a description, and click
 Favourite. Favourites appear at the top of the
Conditions list.
Favourite. Favourites appear at the top of the
Conditions list. 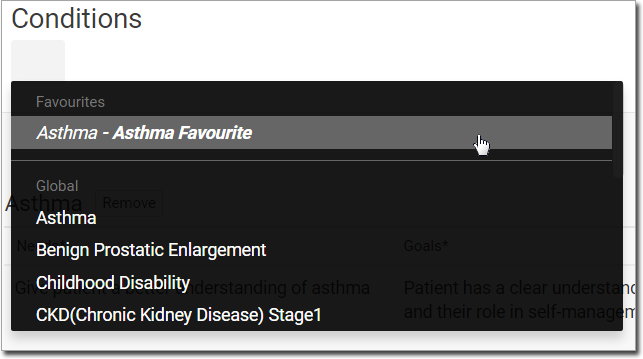
- The image below displays an example of a care plan in edit mode. Notice
that each field of information is active, awaiting your input.
- Add more conditions as required.
- To add extra goals, needs or tasks, scroll to the bottom of the Condition section, and click Add needs/ goals/ task.
- (Optional) Depending on the condition, you might be required to include
additional providers in the care plan. This list will appear towards the bottom
of the condition details. Enter an assignee for each speciality listed. The
assignee is mandatory.Tip: The providers that appear in the Additional Providers list are copied from the Assignee sections of your Care Plan. If you want to remove a provider from this list, locate them in the Care Plan body and remove them from there.
- Depending on the condition, a recall is automatically added to the condition
at six months in the future. To edit the recall date, click the calendar and
select a new date. For example:

- To remove a condition from your care plan, clickRemove next to the name of the condition. If you cannot see this button, it is probably because you are in edit mode.
- From the Conditions list, select a condition. In our example, we have added
Asthma.
- Click Save and Print.
Results
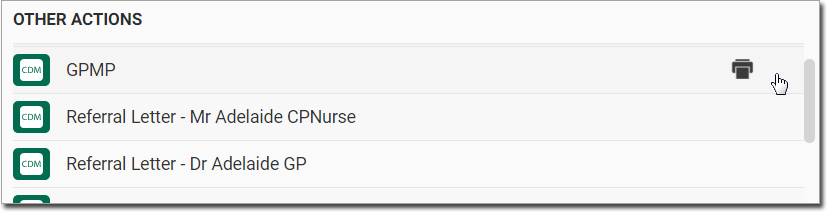
The completed care plan is saved to the section of the  Consult panel and printed.
For the TCA and GPMP+TCA care plans, an EDC form is also added to . This is a government requirement when certain specialities are selected.
Alternatively, to save the care plan to complete at a later time, click Save as Draft.
Click Cancel to close the Care Plan panel
without saving. To return to the list of care plans, click  instead.
When the consult ends, the plan is added to the ![]() Patient Timeline. For more information, see Care Plans in the Timeline.
Patient Timeline. For more information, see Care Plans in the Timeline.