Generate a WorkCover Certificate
Create a WorkCover Certificate from a patient's record using the Letter Writer.
About this task
WorkCover Certificates can be created for each state or territory at any stage of the work cover.
Procedure
To create a WorkCover Certificate:
-
In a patient's record, on the
 Consult panel, click
  Letter Writer.
Tip: If you can't see the Letter Writer, click
Letter Writer.
Tip: If you can't see the Letter Writer, click More.
More. -
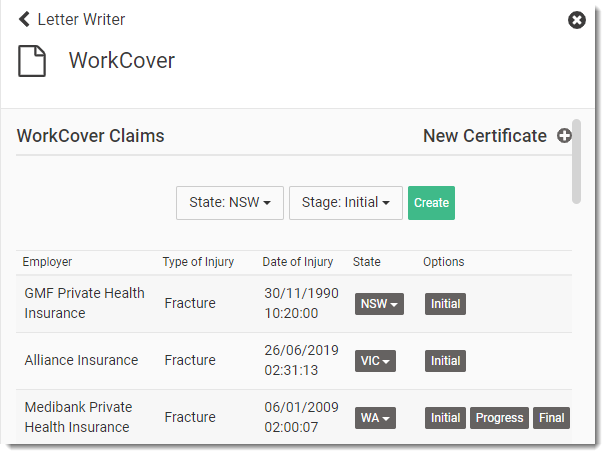
Click WorkCover Certificates. In the
WorkCover panel, a list of available work cover claims for
the patient is displayed.
-
To display the options to create a new certificate, click
 New Certificate.
-
Select the State or Territory in which the injury occurred and the work cover
stage. Depending on the chosen location, the following certificate stage options are
displayed:
- Initial
- Progress
- Final
-
Click
 Create.
- Optionally, click
 Expand at the upper-right to expand the letter, displaying both the fields
and the resulting layout.
Expand at the upper-right to expand the letter, displaying both the fields
and the resulting layout. 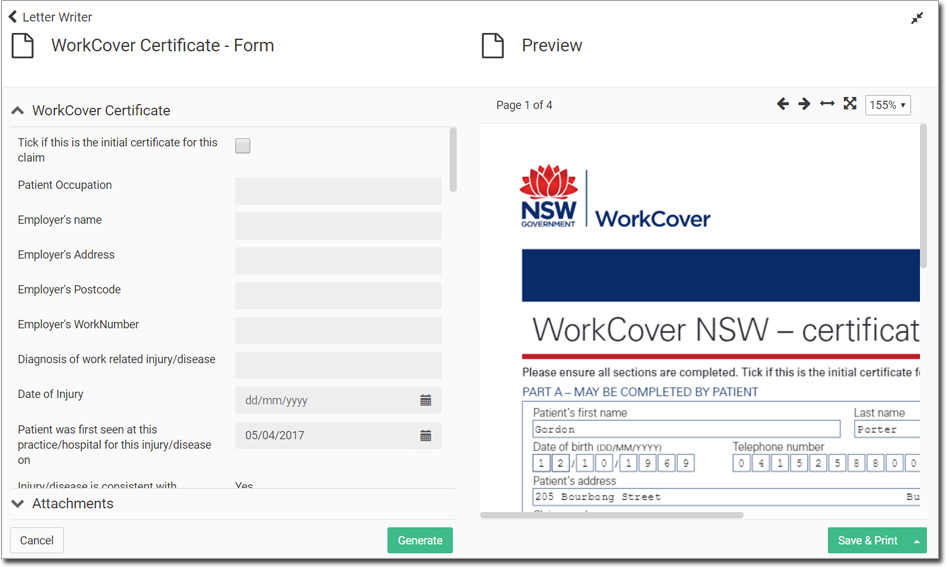
- Complete the form as required.
-
To include clinical information about the patient, expand
 Clinical summaries and select the information you want
to include with the letter.
Clinical summaries and select the information you want
to include with the letter. 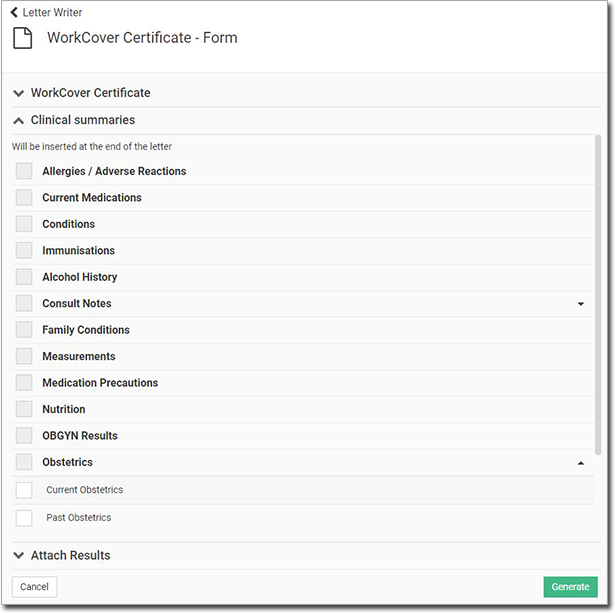
-
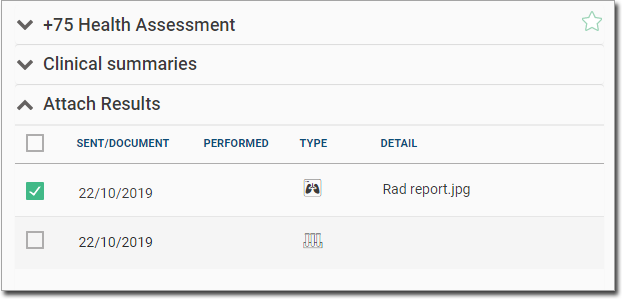
To include results from the patient's clinical record, expand Attach Results and select the results you want
to include with the letter.
- To preview the letter, click Generate.
Results
Tip: To step through the pages of the certificate, click the  Previous and
  Next page arrows.
Previous and Next page arrows.What to do next
To sign the certifcate electronically, click  Sign. The signature you have previously added to Helix is dropped on the
certificate. Click and drag it to the required location.
Sign. The signature you have previously added to Helix is dropped on the
certificate. Click and drag it to the required location.
After you have generated the certificate, in the Editor panel, select the required option. For more information, see Actions in Letters.